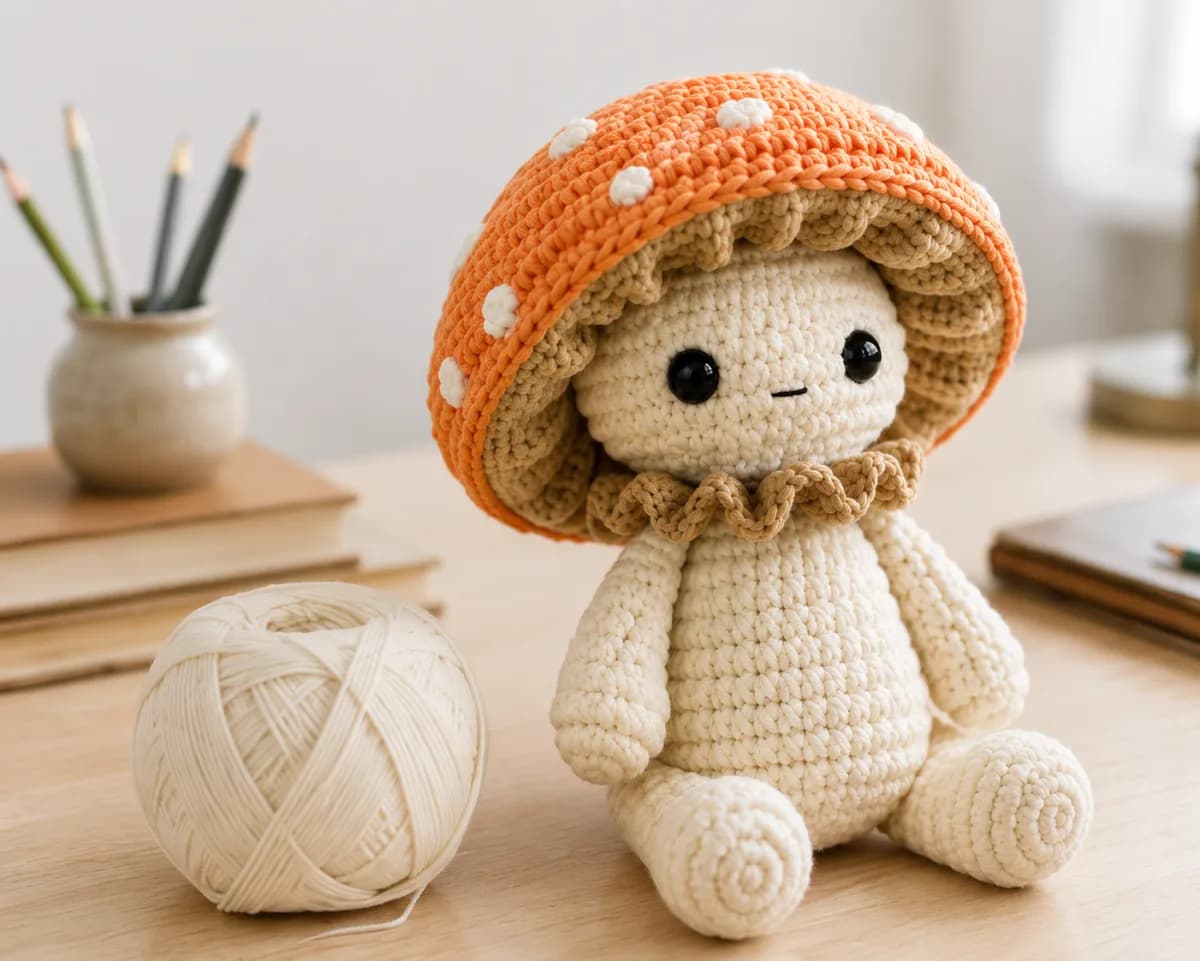
Crochet a soft forest toadstool with a droopy spotted cap, a ruffled collar, curled feet, and a head that turns. The shaping uses careful counting and familiar stitches rather than complicated techniques.
Confident beginnerApprox. 18 cm / 7 in2.00 mm hookCotton fingering / 4 plyUS terms14-page PDF
Get the complete pattern free
Enter your email and we’ll send the printable PDF directly to your inbox.
Includes complete round-by-round instructions and project photographs. Unsubscribe anytime.
Before you begin
Materials for the Happy Mushroom
The main sample uses cotton because it helps the toy hold its shape and keeps the stitch definition crisp. Use one yarn weight throughout so the body, collar, and cap fit together properly.
2.00 mm crochet hook
Cotton fingering or 4-ply yarn in three main colours
A small amount of pink yarn for optional cheeks
Toy stuffing
10 mm black safety eyes or embroidered eyes
Stitch markers
Yarn needle, scissors and sewing pins
Pattern skills
Techniques you will practise
This pattern is aimed at a confident beginner who can count rounds and already knows the basic amigurumi rhythm of increasing, working even, and decreasing.
Magic circle
Single, half double, double and triple crochet
Single-crochet increases
Invisible decreases
Back loops only
Continuous rounds
Simple rows and assembly
The underside of the cap is worked in back loops to create raised mushroom-gill texture. The legs continue directly into the body, and a yarn-core attachment allows the finished head to turn.
Construction overview
How the mushroom comes together
Crochet and stuff the round head, placing the eyes before the opening becomes too small.
Make two feet and continue from the second leg across both legs to form the body.
Add the lightly stuffed arms and work the curling frill collar in rows.
Anchor the head to the neck so it remains movable.
Create the ridged under-cap, crochet the cap onto its edge, and add thirteen spots.
Use a thin layer of cap stuffing, pin the angle, then sew the cap securely to the head.
Sizing options
One stitch count, three possible sizes
The PDF’s main version finishes at approximately 18 cm using cotton fingering yarn and a 2 mm hook. Keeping the stitch counts identical while changing yarn and hook can produce a pocket-sized mushroom around 13 cm or a chunky version around 50 cm. Actual measurements vary with yarn and tension.
Make a firm fabric with no visible stuffing, but avoid over-stuffing the head, neck, or cap; those areas need softness for the cap position and turning-head construction.
Happy Mushroom FAQ
Questions before you start
Is this a beginner crochet pattern?+
It suits a confident beginner who knows the magic circle, single crochet, increases, invisible decreases, and how to count continuous rounds.
Does the page include the complete instructions?+
This page gives the materials, techniques, sizing, and construction overview. The free printable PDF contains all round-by-round instructions and project photographs.
Can I use a different yarn?+
Yes. Keep the same yarn weight across every section and adjust the hook to create a firm fabric. Changing yarn and hook changes the finished size.
Are the cheeks required?+
No. Crochet the optional pink circles or add a small amount of powder blush for a softer face.